Just a thought....
Don't compare your life to others'. You have no idea what their journey is all about.

Showing posts with label recipe. Show all posts

Sunday, 02 September 2012

Granola Bars


Technorati Tags: ,,,
granola bars


Category:
Baking

Servings:
18 bars

Description:
Because I'm usually out on the road at mealtimes, keeping up with edibles that are light, can be carted around easily and eaten on the run can be a challenge.

The cheaper snack alternatives out there are high carb, high fat, often stale and frequently messy, so I decided to try my own granola bars. I love granola : ) For me, a small yoghurt and a granola bar is enough for lunch. I have no control over the quality and ingredients of the bought bars.

This recipe is fantastic! I don't remember where I got it
25 minutes to make (if you have the fruit pre-chopped)

Ingredients:
* 1 egg
* 1 egg white
* 3/4 cup sugar
* 1/2 cup packed brown sugar
* 3 tbsp canola oil
* 1 tsp vanilla
* 1 1/2 cups all-purpose flour
* 1 tsp baking soda
* 1/2 teaspoon salt
* 1 1/2 cups rolled oats
* 1/2 cup diced apples, raisins, or dried fruit (optional)

My own variations:
Used half a cup of chopped cashew nut, half a cup of mixed dried fruit, half a cup of coconut, and 1 tablespoon honey (as I didn't have enough brown sugar)

Directions:
Coat a 13" X 9" baking pan with non-stick spray and set aside.
Mix the egg, egg white, sugar and brown sugar until smooth.
Add the oil and vanilla; mix 10 to 15 seconds.
Add flour, baking soda and salt. Mix until just blended. Add oats and incorporate.
Mix in extra ingredients (apples, raisins, etc) with a fork.
Transfer the dough to the prepared pan; press into pan with wet fingers.
Bake at 350F for 25 to 30 minutes, or until a toothpick inserted in the centre comes out clean. Cool in the pan.

Note: I didn't leave mine to cool in the pan, as my oven bakes really hot and it looked like it was beginning to burn. I cut the pieces in the pan and turned them out onto a granite slab to cool. They're perfect!

Saturday, 07 June 2008

This week...

I have been meaning to blog, but every night, I go to bed thinking... oh darn.... didn't blog today. Somehow, the days have just filled themselves up.
At the start of the week, I was having a discussion with a friend on English and vocabulary. I showed her a recipe for a simply divine lemon sorbet I had found - I will post the recipe. She said, "Oh, sherbet." To me, sherbet is a tangy powder kids love to lick out of packets, which fizzes and tingles in your mouth. Sorbet is a frozen fruit juice. I wandered off to my bookshelf and hauled down the rather hefty Google. Apparently, a sorbet is what I think it is, while a sherbet may contain egg or dairy. Frankly, every site I land on seems to argue the toss. Apparently, my concept of sherbet is more of a British thing.
I found this:

Sherbet is a surprisingly easy sweet to make, with only three ingredients and no cooking involved. To make your own sherbet, you will need:
Sugar, usually caster or icing sugar
Bicarbonate of soda (aka sodium hydrogen carbonate, aka 'bicarb' or baking soda)
Powdered or crystalline citric acid (Note 1)

The manufacturing process is quite simple: mix the ingredients together. Just make sure your equipment and ingredients are dry (this is really important). The citric acid usually comes as dry crystals or powder. If they offer you a liquid form (a solution), just say no! The sherbet begins to dissolve and fizz as soon as it comes in contact with liquid, so it must stay dry until it touches the tongue.

The hard part is getting the taste right. You change the taste by changing the proportions of the three ingredients. A good place to start is with two teaspoons of sugar, one teaspoon of citric acid, and half a teaspoon of bicarb.


One source suggested using jelly powder (jello) for flavour. I suggested that my friend makes some to keep her kids amused during the long summer holidays. I think she may have fainted, having visions of sherbet-coated sofas. (Another Englishism... to me, it is a 'couch', but everyone else seems to insist on calling it a 'sofa'). I then suggested playdough....

kids-playdough

The idea of playdough on her couches got me a similar reaction, so I suggested that she shut her kids in the bathroom with a tub of playdough. More horror ensued. Do I know how boys and faucets ('taps' to me) mix?? I gave up at that point. Boys are as much of a mystery to me as speaking Portuguese. Basic communication is possible, but let's not get too deep ; )

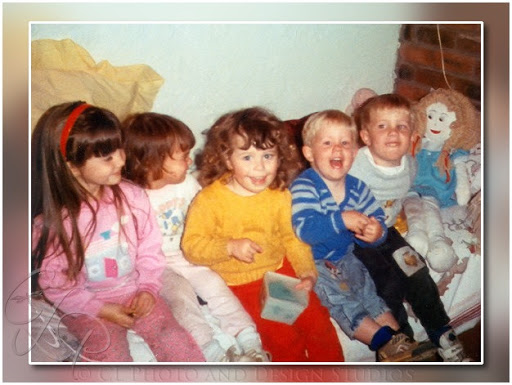
Tat was raised on playdough. In the photo above, she is the grubby urchin in the middle clutching her Tupperware containing playdough. There was always playdough on hand in various colours to keep the kids amused. Here is the recipe I used (for those who have little horrors to keep entertained):

    *  1 cup flour
    *  1 cup warm water
    *  2 teaspoons cream of tartar
    *  1 teaspoon oil
    *  1/4 cup salt
    *   food coloring

Mix all ingredients, adding food coloring last. Stir over medium heat until smooth. Remove from pan and knead until blended smooth. Place in plastic bag or airtight container when cooled. Will last for a long time.

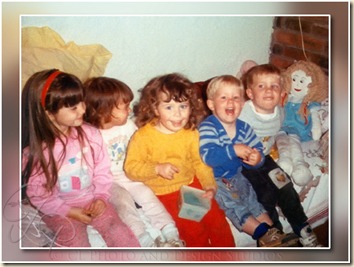
Speaking of keeping entertained, here is the latest project I am busy on. It is a challenge, but I'm enjoying it. Sadly, the original wasn't very big. This comes from a photo album that got wet. The pages stuck together and ink from the opposite side transferred to the photo.

restore-granny

On Wednesday, Tat went for her endoscopy. Somehow, this must have gotten to me, as I dreamt the night before that she never woke up from the anesthetic. I've been having many disturbing dreams. The night before, I had a dream that could rival the horror movies I refuse to watch, complete with butcher's knives and gore. Thankfully, I don't remember much of that dream, but I remember the dream of Tatiana very clearly. Anyhow, the endoscopy went well enough. All the other patients wobbled out, supported by the nursing staff, while Tat did her Tigger thing coming out, chatting brightly to the nurse. That kid is weird. We will get the results in 20 days. It is a timing thing here. I'm not terribly surprised, as we had to wait over 6 months for the actual exam appointment.

My next task is to get my sewing machine repaired. It has never worked since our move. I don't relish hand sewing. I commented to Tat that there was a time when I was so very proud of my hand sewing, but now I'll avoid it at all costs. I hold my pc responsible for that, along with the downfall of my handwriting, which was never stellar.

Tuesday, 06 November 2007

A gem of a plant


Its dull, grey and wet here today. Coolish too. We just saw a news report and photos of snow a few feet deep in Columbia. What's that about? They're right on the equator!


Remember a while ago I blogged about planting my gem squash seeds? I was worried that they wouldn't come up, as the seeds expired in July this year. A few came up. Then the dogs decided they'd love a taste of this strange new herb. They regularly eat my herbs :( They uprooted a few of the young seedlings and munched at others. I 'transplanted' a couple back into the pot and hoped. The third time they uprooted them, I found some mesh and tied it over the pot. They're doing well now, as you can see in the photo. My lavender died. I have a feeling the squash will climb the lavender stem in this pot. Jorge stuck two of the squash seedlings in there, as the lavender was already long gone. I'm going against all the rules of squash growing as it is by planting them in a pot and hoping for a harvest, but even if I just get a few squash, I'll be thrilled. I'll send seeds to all my needy squash-deprived friends out of this harvest... promise! Never mind customs. I'm becoming a customs pro lol


For those who don't know what gem squash is, its a squash that, to my knowledge, is exclusively South African, though, at the rate the expats are going, it's fast becoming international. Here is a pic I found of some squash. This lot was grown in Australia. The average size of a gem is about that of a large apple. The outer skin is hard, though often cooks soft and I love to eat it with my squash. Back home, we serve our squash with salt and a dollop of butter or, as my gran raised me to, with sugar and butter!! Then there's the ever-popular gem squash served with creamed sweetcorn and butter, often topped with cheese. I'm drooling as I'm typing this. If you want more info and a delicious-looking recipe, here is another expat blogging on gem squash: cooksister (I believe her name comes from koeksister, which has me drooling for yet another South African institution *sigh*)


Let me get a move on now and off to the kitchen. I'm going to start a batch of aniseed rusks ;) Want some? We've not had any since moving to Brazil. I finally found a recipe that doesn't involve buttermilk, which we don't have here.


From Wiki, on rusks:"In South Africa, 'rusk' normally means the biscuit, which is considered a traditional food (called beskuit in Afrikaans) and is eaten after having been dipped in coffee or (less often) tea. Historically, rusks evolved (along with biltong) during the country's early pioneering days as a way to preserve bread in the dry climate. It was traditionally baked at home, but there are now several mass-market versions available, the most famous probably being Ouma Rusks. Many bakeries, dellis and home industries also sell them, often using more exotic ingredients than their mass-market counterparts. In addition to the traditional "plain" and buttermilk flavours, flavours available, such as wholewheat, condensed milk, muesli, and lemon poppyseed are available."

Oh, I just found an interesting article on Ouma Rusks at Wikipedia. While you go off to read that, let me share the recipe I'm going to use today. For those who don't know rusks, do try it for a taste of South Africa. They're delicious dunked in coffee, the bigger the mug, the better. Some folk even dunk them in tea ;)

Aniseed rusks
Ingredients:
1 kg (2lb) cake flour + 2 cups
7 g (half a teaspoon) salt
250 g (8oz - about a cup) butter
30 ml (2 tablespoons) whole anise seeds
20 g (0.6oz - a tablespoon... just measured the package) instant yeast
300 g (9oz) sugar
1 egg
300 ml (0.6 pints) water


Method:
1. Sift flour and salt together. Rub butter into flour until it resembles breadcrumbs. Mix in the anise seeds, yeast and sugar.
2. Make a hollow in the flour. Break the egg into the center. Add the water slowly, stirring and checking consistancy. You may need a little more flour. Knead until elastic.
3. Cover with cling film and leave to rise in a warm place until double in size. Don't knock back.
4. Shape into balls and place in a deep bread tin sprayed with nonstick baking spray. Leave to rise until even with the edge of the tin.
5. Place rusks in the oven, preheated to 200 °C (390°F), immediately reduce temperature to 180 °C (350°F), and bake for 45 minutes.
6. Remove from tin. Leave rusks to cool completely before breaking them apart (do not cut with a knife).
7. Dry out in the oven at 100 °C (200°F).